background

Showing posts with label Renew. Show all posts

Monday, February 11, 2013

Stairway Family Gallery

Oh. My. Blog. I feel like I haven't been here in FOREVER. But at last, after about 6 months of working long hours and a driving a long commute, I am now working part time as a college instructor, so obviously I can get back to important things. Like Lemon projects and blogging about them.

I've been itching for a family picture gallery in the staircase for sometime now. I chose all my own pics (no professionals) so I could easily edit and order what I wanted. I ordered all of my prints from Shutterfly (which I love) and had them delivered. I chose black and white or sepia prints. I showcased family pictures we've done in years past, right alongside vacation shots. I even threw in a few candids for good measure.

Being the frugal crafter/decorator that I am, I scored my frames from a retail store that was getting new displays. They had used these frames in the past and were getting rid of them. I saw my opportunity and seized it. I just had to remove the silhouette pictures in them, and clean them up a bit. Moral of the story: if you see a store with displays you like, ask the manager if they ever change them, and to let you know when they do so you can purchase (usually for pennies on the dollar) or take them instead of them getting thrown out.


All of the frames were either black or silver, and quite large (8"x10" or bigger), so I used a few smaller frames I already had to add to the collection. If you don't have the option for cheapo frames like I did, consider thrift or garage sale shopping for frames you like, then spray painting them all one color or color story (i.e. white, blue, teal, and tan for a beach theme, etc).

After my prints arrived, I took stock of what sizes I had, and the sizes of frames I had, then made a trip to Hobby Lobby for some pre-cut mats in black and white. If the pre-cut mat colors and sizes work for you, this is definitely the most cost-effective way to go. The Lobby of the Hobbies carries them starting at $1.99. Now, I did have square frames and square prints, but I got those cut in simple white mats for only $6 each.


After framing was complete, I set out to create my layout and get them up on the wall. I found lots of inspiration on Pinterest, natch. Be inspired here, here (cute ideas for more than just stairways), and here. You can also get very descriptive tips here. Pinterest and I have already done the dirty work for you. You're welcome.

So here's my stairway (excuse my spackle patches and monkey hooks from previous hanging attempts - those are getting painted later this week):

from the landing

from the top
Pretty much all the DIY sites or pins show making a template, putting it on your wall, then putting in your nails, blah blah blah. I'm more adventurous (or stupid) than that. I planned out my layout in the middle of my game room floor, taking pictures of each layout as I went so I could compare.


I then figured, based on the width of my frames and the spacing I wanted that I'd be centering each column of frames over every other stair. I picked the height (47") I wanted for the bottom frame in the left column and ran with it for the rest. Between frames vertically, I went about 3-4".


I hung all the bottom pictures, getting my spacing right, and then went up from there. Since I wanted each column centered, I used my level to align the monkey hooks (in my humble opinion, by far the easiest hanging tool) so the pictures would automatically hang correctly.


Note, my last two columns start at the same height because they are based off of the landing of the stairway.

And voila, my finished product for less than $50, frames, mats, and prints included! Not bad for my first foray back into the project world.


More lemons coming your way soon.

Tuesday, March 27, 2012

Painting the Deck

Hey everyone! Sorry I've been MIA for a while. I've been really busy doing not fun projects. And by not fun, I mean repainting our deck in 85 degree weather. It really wasn't fun, and it's probably not that interesting, but just to prove to you that I have, in fact, been busy and not neglecting you, here's some pictures as evidence.

Before: the deck was white. Which sounded like a great idea until you factor in our four dogs and their footprints. Not cool.


Two of my pooches. On the left, Lola the Pomeranian, on the right, Bridgette the lab mix/pound puppy. Lola tries to copy everything Bridgette does.


Midway through painting.


Finished product. I might go back through and paint the cross rails red, too, and touch up the pickets. We'll see how hot it is next week. 


Also, for some reason, the red is scraping off in a few places. Not sure what's up with that. The hubs thinks it may sink in better if we use an oil based paint. I used an acrylic solid stain specifically designed for outside surfaces. I should figure it out and fix it, but it's really hot, I'm a little sunburned and covered in mosquito bites. I would have so been the first one to die in The Hunger Games.

Speaking of T.H.G., who went to see it this weekend? We went to a 3 a.m. showing on Friday morning because all the midnight screenings were sold out. It was totally worth it. I'm a HUGE fan of the books, and enjoyed the movie. Probably would have preferred a few things done differently, but that's just because my imagination is better than any movie!

For now the deck works for me! I think I'll figure out a solution later. Unless any of you have suggestions? In the meantime, I'm ready for summer barbecues and pool parties!

Sunday, March 11, 2012

Ikea Medicine Cabinet and First Aid Kit

I finally finished my Ikea medicine cabinet/first aid kit. If you remember from my initial post about it, it was a salvage from the "as-is" corner of the store, and therefore it had no internal shelves or shelf pins. Simple enough fix, right? Ha. Not so much.


I figured I'd pop right down to Home Depot and pick up some shelf pins. Well, it turned out the shelf pin holes were a totally non-standard size. Shocking, considering this is a piece of Ikea furnishing, right? They were a way, way small size of 1/8". 

My dad suggested buying a steel or aluminum rod and cutting it, but neither HD or Lowe's carried those small enough. My hubby suggested cutting pieces off of a wire hanger. Too small. Back to the store I went. We finally found some nails with a 1/8" head, and I decided I could make those work. I don't know what kind of nails these are, but they have a little white "top hat" at the head of the nail. It worked out perfectly, because it extended the amount of the nail that was 1/8" so, put in head first, they fit securely in place.


Now that my shelf pin problem was solved, I set out to change the doors. They opened from the right, yet, with the location I was hanging, I needed doors to open on the left. After careful inspection, I noticed that Ikea had cleverly left spaces on both sides of the cabinet, so you could configure the doors however you wanted. I found holes on the exact opposite side of the cabinet from where the hinges were currently mounted. You can see (circled below) that they are bigger than the shelf pins, which is how I knew what they were:


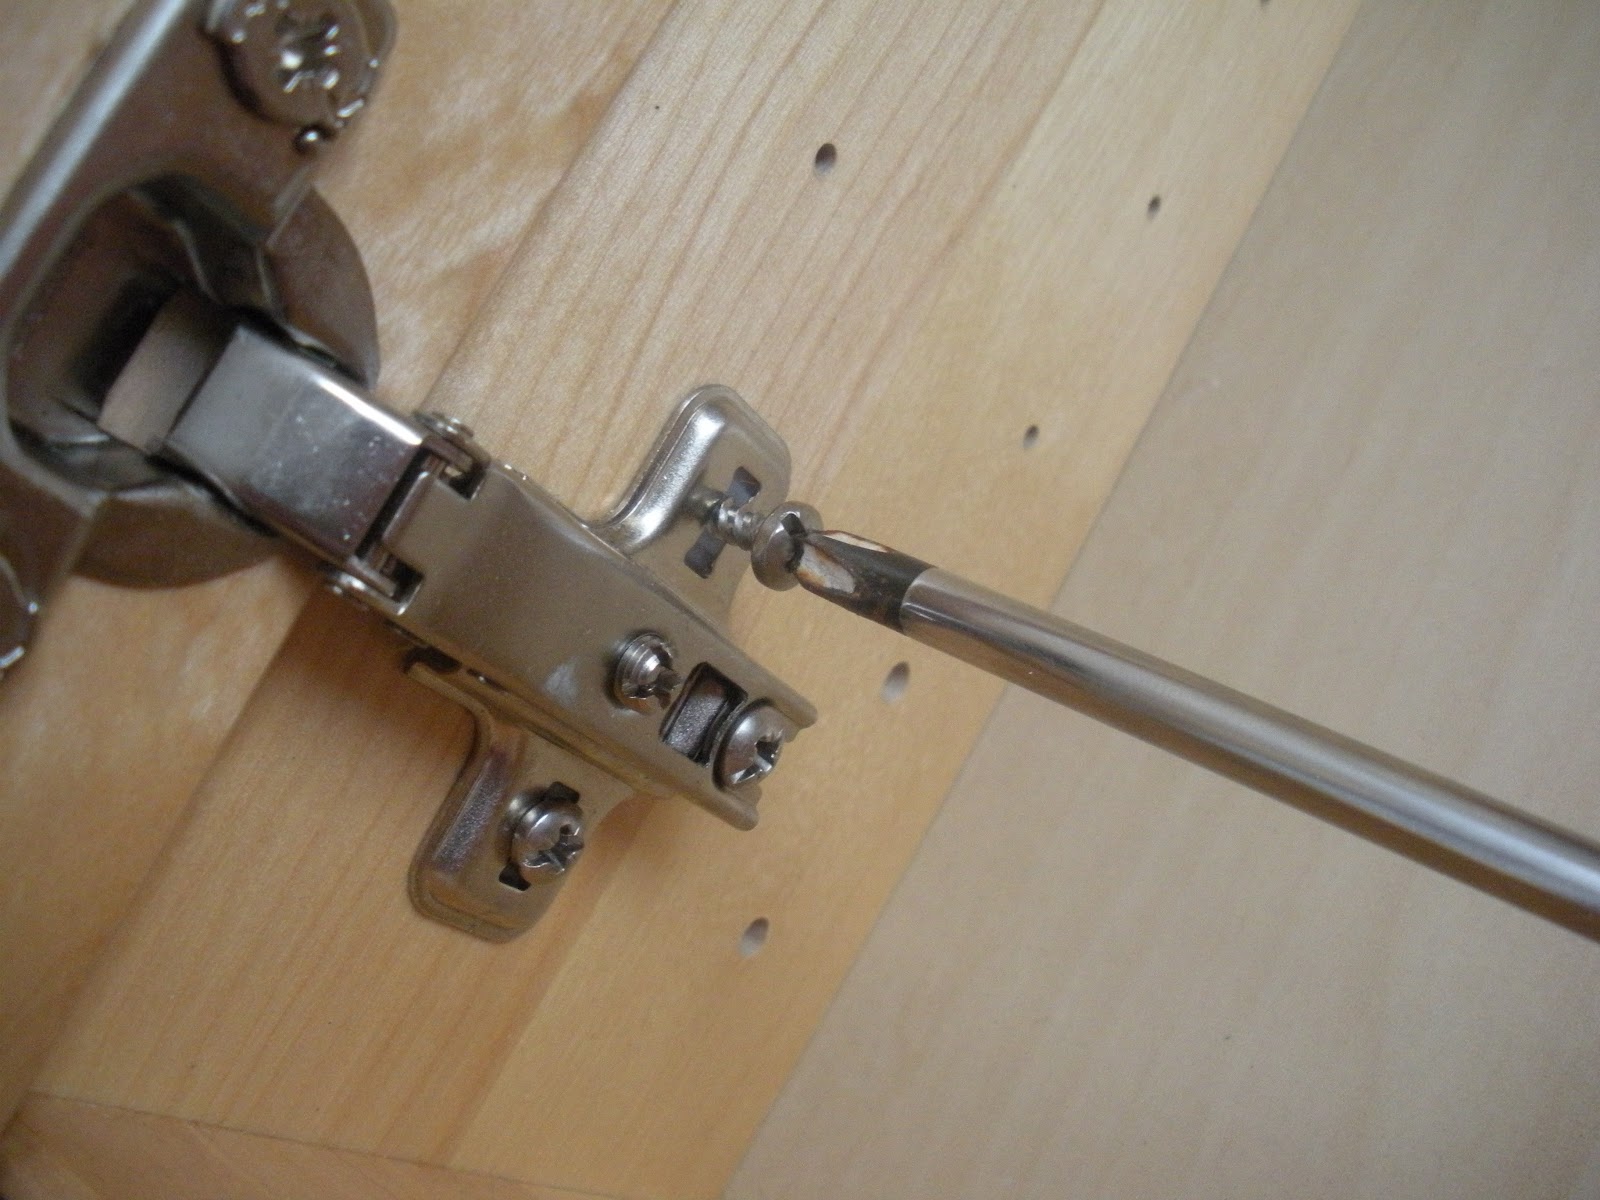
I easily unscrewed the hinges where they were attached to the side of the cabinet, pried out the plastic insert using a flat blade screwdriver, stuck it in the other side, flipped the door, and screwed it back in. I then repeated with the top door. With this one I had to make sure there was a spot for the lock to swing into, and luckily there was, otherwise I would have had to get the hubs to route out a spot.


I then used a very legit measuring device to determine my shelf placement. 


And, using needle nose pliers for leverage and grip, I shimmied the nails into place. It was a pretty tight fit, so I don't think I'll be adjusting the shelves anytime soon. I used 4" wide, thin pieces of aspen (probably about 1/4") to create shelves. 

I found a first aid kit at Sam's Club for under $20, and removed the contents to put into my first aid kit. I put loose items like the individual antiseptic wipes, q-tips, gauze, single packets of things like pain reliever, antibiotic ointment and burn relief cream into Really Useful Boxes that I got at Office Depot. I LOVE Really Useful Boxes because they are cute, durable, and come in lots of sizes and colors. I also picked up some cork tiles for inside the lower cabinet door. The cork board can be used for emergency numbers, or important instructions or contacts for the kids, or a pet or house sitter (or a baby sitter for those of you with little ones). A Command hook holds scissors and tweezers.


Again, since this was an as-is item, it did not have any hanging hardware, but it did have two nickel sized, metal-reinforced holes in the back, through which I guessed it was supposed to hang. I picked up some toggle bolts, and washers (since the holes were WAY bigger than the heads of the bolts), and drilled holes into the sheetrock (after using a stud/electrical finder to determine there was nothing of importance behind where I was hanging). Toggle bolts are good when you can't mount something to studs. Just follow the instructions on the packet or - thread the bolt through the washer, then through the hole inside the cabinet, then screw the toggle on the bolt (behind the cabinet). Squeeze together the toggle, insert into the hole in the drywall all the way, then tighten the bolts.

Since the top locks, it's the perfect place for cold medicine or prescription medications. My cabinet is high enough that any little hands that might be over can't reach it anyway, but just to be safe, it's there if we need it. I positioned the cabinet in the laundry "room" - which is really a closet - since it's centrally located between the garage, kitchen, and backyard/pool - where most boo-boos tend to happen.


Seeing it next to my white laundry cabinets, makes me want to paint it and get matching knobs for all the doors. Hmm...

Friday, February 17, 2012

Dine and Design

About three years ago we moved into our house, which came complete with formal living and dining rooms. Turns out we're not very formal people, so we didn't have any formal furniture.

We decided to turn the dining room into an office, since it had a door on one side, and an entry on the other just the perfect size to add double doors onto, allowing it to be closed off for privacy. Even though it was farther from the kitchen, the formal living room became our dining room...and sat empty for about a year.

A good family friend was getting a new dining room set, and gave us the old one for free - the best price there is! It's blond wood, with light creamy colored upholstery and wasn't really our style. Before I'd seen it, I had no idea what blond wood was, but it's exactly like it sounds - wood the color of blond hair. Probably not something we'd pick out ourselves, but it was solid wood, high-quality, and came with 4 regular chairs, 2 arm chairs and 2 leaf expansions. And it was free. Free, free, free. Free as a bird. Did I mention that?


I resolved to recovering the chairs with a darker fabric that would really pop against the blond, and that would match our decor better, thus updating the look. I picked up this fabric on sale at Hancock fabric a while back:


It's pretty similar to the fabric we had our couches reupholstered in several years ago (my mom owned our living room set before she married my dad way back in 70s - they've been redone 3 times now and are surprisingly still in excellent shape). The fabric is warm, soft and comfy, and even better, you can wipe it clean with a damp washcloth. Perfect for couches and dining room chairs! 

Remember how I said in my lamp redo tutorial I like to tie in one or two elements throughout the house? This reddish orange color follows us around from the living room and kitchen, to the dining room, game room, and our master bath, so that's a plus!

After I bought the solid fabric, I watched too much HGTV and decided that maybe I wanted something fun and funky, but I really can't bring myself to cover the chairs in a crazy pattern that I'll end up hating next year. So, like so many other projects, this one got put on hold.

Fast forward to last fall. Our house was on the market for a few months, but it didn't have any sales action and my husband's transfer was cancelled so we stayed put. While showing the house, we switched the dining room into the actual dining room (instead of where it had been in the living room). Turns out we actually liked the room where it was supposed to be. Apparently it really is easier to serve the dining room if it's by the kitchen. Who knew?

So now that our dining room table has its final resting place, and we've repainted the walls and hung new curtains it's time to get down to business reupholstering and accessorizing.

dining room rug - the colors look more vivid in real life
sage curtains

I picked up a yard of this printed duck fabric that should coordinate with the red microsuede, the floor rug, and the curtains.


Just trying to decide if I want to do the upholstery on the arm chairs in this, or make some backer pillows for them. Hum, dee-dum...

Suggestions?

Tuesday, February 14, 2012

Lamp Reveal and "Tutorial"

Finally! I finished my lamp makeover. Whew! And not only is this her big reveal, but also my first real tutorial. Actually, it reads more like a play-by-play, since unless you have the same lamp, your steps might be slightly different, but you get the idea. Looky-look:

Before
After
Like I said before, the antique-y look of the lamps is nice, but a little dark and I wanted to change it up a bit. I used the lamps in my game room as inspiration.

Inspiration Lamp
Although the look of this lamp is a little bit too modern for me (they came with the living room set we have), I do secretly love them. The mirrored look and black shade are real clean, plus the mirrored look makes the lamp and space seem brighter, so I figured I could take that color scheme and apply it to my antique-y lamps. Even though our rooms aren't matchy-matchy, I do like to have one to two themes or color schemes carry through so that there is a cohesion throughout the house.

This project called for a variety of supplies, some of which I did not realize I needed until about halfway through the transformation. Here is what I started out with: Krylon Looking Glass spray paint, painter's tape, tack cloth, beads to replace the original ones, and jewelry pins to hang the beads from.


A word of advice on the spray paint: after traveling to several hardware and home improvement stores (thinking they would have the best spray paint selection and they did have huge amounts, but relatively small Krylon selection) I finally found the Krylon Looking Glass paint at Hobby Lobby. They seem to have the best selection of Krylon that I could find. The Looking Glass paint is much more costly than normal spray paint, and comes in a much smaller can, but you can use one of Hobby Lobby's weekly coupons (typically 40% off) to get it for a steal. My store will even let you just show the coupon on your smart phone, so I'm saving money and saving trees all at once - score! And no, I do not work for Krylon or Hobby Lobby, just passing on a good deal when I find it, and as far as I can tell, Krylon are the only ones making this cool paint I wanted to try!

I'll start at the beginning and you'll see why I realized I needed more supplies at the same time I did. First, obviously, I unplugged the lamp, then removed the shade, shade hardware and light bulb. Next, I covered the part where the light bulb screws in and the cord in painter's tape. In hindsight, I could have probably figured out how to remove the brown cording and replace it with black, but that's not too important to me, nor am I really interested in working with electricity, so I'll let that little detail go...


Now, the whole reason I picked out this lamp years ago was because I liked the orange crystals. But years of moves have left several missing, as you can see, so at this point I went ahead and removed the crystals and the rings holding them. I put them aside, guessing I can use them on another project since there aren't enough to salvage for this one. Before I can paint, I rub the whole thing down with tack cloth to get off any dust or residue hanging around. I have no idea what this lamp is actually made of, so I figured that'd be a safe bet without eating away at anything important. You can pick up tack cloth in the paint section of a home improvement store for a few bucks a pack.

And now it's time to paint! I guess since, technically, this paint is supposed to be used on glass, it's very thin and runny. It took 2-3 thin coats on each side to get the desired effect. You'll want to work with it like any other spray paint, using quick, sweeping sprays. I started with the lamp laying on its side, so less of it would run off, thus somewhat eliminating streaks. After all sides dried and had been coated a few times, I stood the lamp up and touched up any streaks or runs with a quick spray. Luckily, it dries pretty quick, so the multiple coats were no big deal. Again, like with any other spray paint, make sure to use in a ventilated area, and cover the surrounding area to prevent overspray issues.

With the lamp painted, I turned my attention to the beads. Here's where I started to run into problems. I couldn't find any beads with a hole horizontally through the tops like the original orange crystals (a little blurry, but hopefully you see what I mean):


I had no choice but to settle for beads from the jewelry making section of the store with one hole, running vertically through it, which is why I got the pins. I figured I'd thread the beads on, and twist the top somehow, either hooking it to the original rings or through the holes in the lamp. This was a good idea, in theory, until I realized the holes in the beads were so big that the pin heads went right on through them. Back to Hobby Lobby I went, in search of tiny black beads, small enough to be a buffer between the pin head and the larger beads with larger holes. And here you have extra supply number one:


On the little rescue beads went, followed by the black jewelry beads. I finished it off by first bending the pin into a sort of upside down "L" shape like this:


After I got this done, I just bent the top part back around counter-clockwise into a sort of question mark shape so I could loop it through the holes in the lamp. I alternated the larger, middle bead, with either solid black, or a transparent, smoke-colored one.


And now the rest of the extra supplies come into play. I couldn't find a lamp shade that I really liked, plus at $15-$20 a pop, I didn't want to settle for one. Again, wandering around Hobby Lobby I stumbled upon a solution to my dilemma. I found white, self-adhesive lamp shades! All you have to do is buy the fabric you want, and stick it to the lamp shade and voila! I instantly became a genius in my own mind.

I grabbed a small cylinder shaped self-adhesive lamp shade, and then a half yard of black burlap. The lampshade actually called for 5/8 yard, but I have no idea why, since I didn't even use up a quarter of what I bought. I used this week's 40% coupon on the shade, which was originally $7.99 and paid $1.99 for the burlap, so I'd say my little shade was a steal! And easy! All you do is peal off the white paper label, lay it over your fabric, and cut out the fabric, leaving about 1 inch grace on each side.

Self-adhesive lamp shade and burlap
Extra supplies: Gorilla super glue, hot glue and glue gun, small clamp, scissors
Trimming the fabric for the lampshade
I picked burlap for a few reasons. First, let's be honest, it's cheap. Second, I wanted a black shade, but didn't want to block too much light. And lastly, it's got a nice earthy texture to contrast with my looking glass lamp. Because I wanted the white to show through the black, I did one layer of the burlap. Since burlap has a gridded texture, I had to make sure to wrap it evenly.


After your fabric is wrapped around, just fold the remaining edge in on itself and glue, using either super glue or a glue gun. I used super glue for this part since I wanted a really good hold on the outer seam, and have a teeny tiny clamp I can use. Also because I really enjoy Gorilla Glue and use it whenever possible. Seriously, the handle on my steam mop literally fell off one day and instead of buying a new one, I Gorilla Glued it back on, and it's still working like a champ. This stuff will hold anything, I'm pretty sure. I'm totally not a Gorilla Glue spokesperson, but I do have a small arsenal of it in the garage. Just in case. Back to the lampshade...just dab a little glue under the fold and clamp (or hold for a while).


The final step of the lampshade is just to tuck the edges to the back side, tacking down with glue as you go. I switched to a hot glue gun at this point because I was getting antsy and wanted to see the finished product. If you go this route, just be sure to pull off all the glue strings that accumulate. Do about an inch at a time so your glue doesn't dry before the fabric takes hold. Make sure to pull the fabric tight to avoid any wrinkles in your shade.


Now, all that's left to do is put the lampshade on, replace the bulb, turn on and check it out!


I really like how the paint turned out, allowing a little of its previous darker self to show through (or maybe it's the shadows...), and the way it reflects the light. I think the burlap was a perfect choice to achieve color and texture and still retain light.

Whew! I finished my first tutorial! Hopefully it was neither oversimplified nor overcomplicated. I've got plenty more ideas and projects looming in my future to share with you, which means plenty of opportunity to become a tutorial queen! Hope you enjoyed this and maybe it'll inspire your creativity! Oh, and if you're reading this, but not a follower, do me a favor and swing on over to the right side of the page and click "Join This Site" for me! Hurry up, I'll wait for you. Okay, thanks! And to show my gratitude for following me, I'll be adding more projects and recipes soon. I'm just getting started here.

I'm entering this tutorial in the DIY Project Party Monthly Contest over at The DIY Club! Visit their page http://thediyclub.com/ to check out really cool ideas, or enter the contest, too!


I am also sharing here at the Shine Your Light blog: