background

Thursday, June 19, 2014

Herb Drying 101

I'm really into drying and preserving herbs this year. Mostly because buying them in the spice aisle is expensive, and plants are not. Plus, they keep on giving year round here. If you don't live in a warm climate, you can plant your herbs in containers and bring them inside a sunny window during the winter.

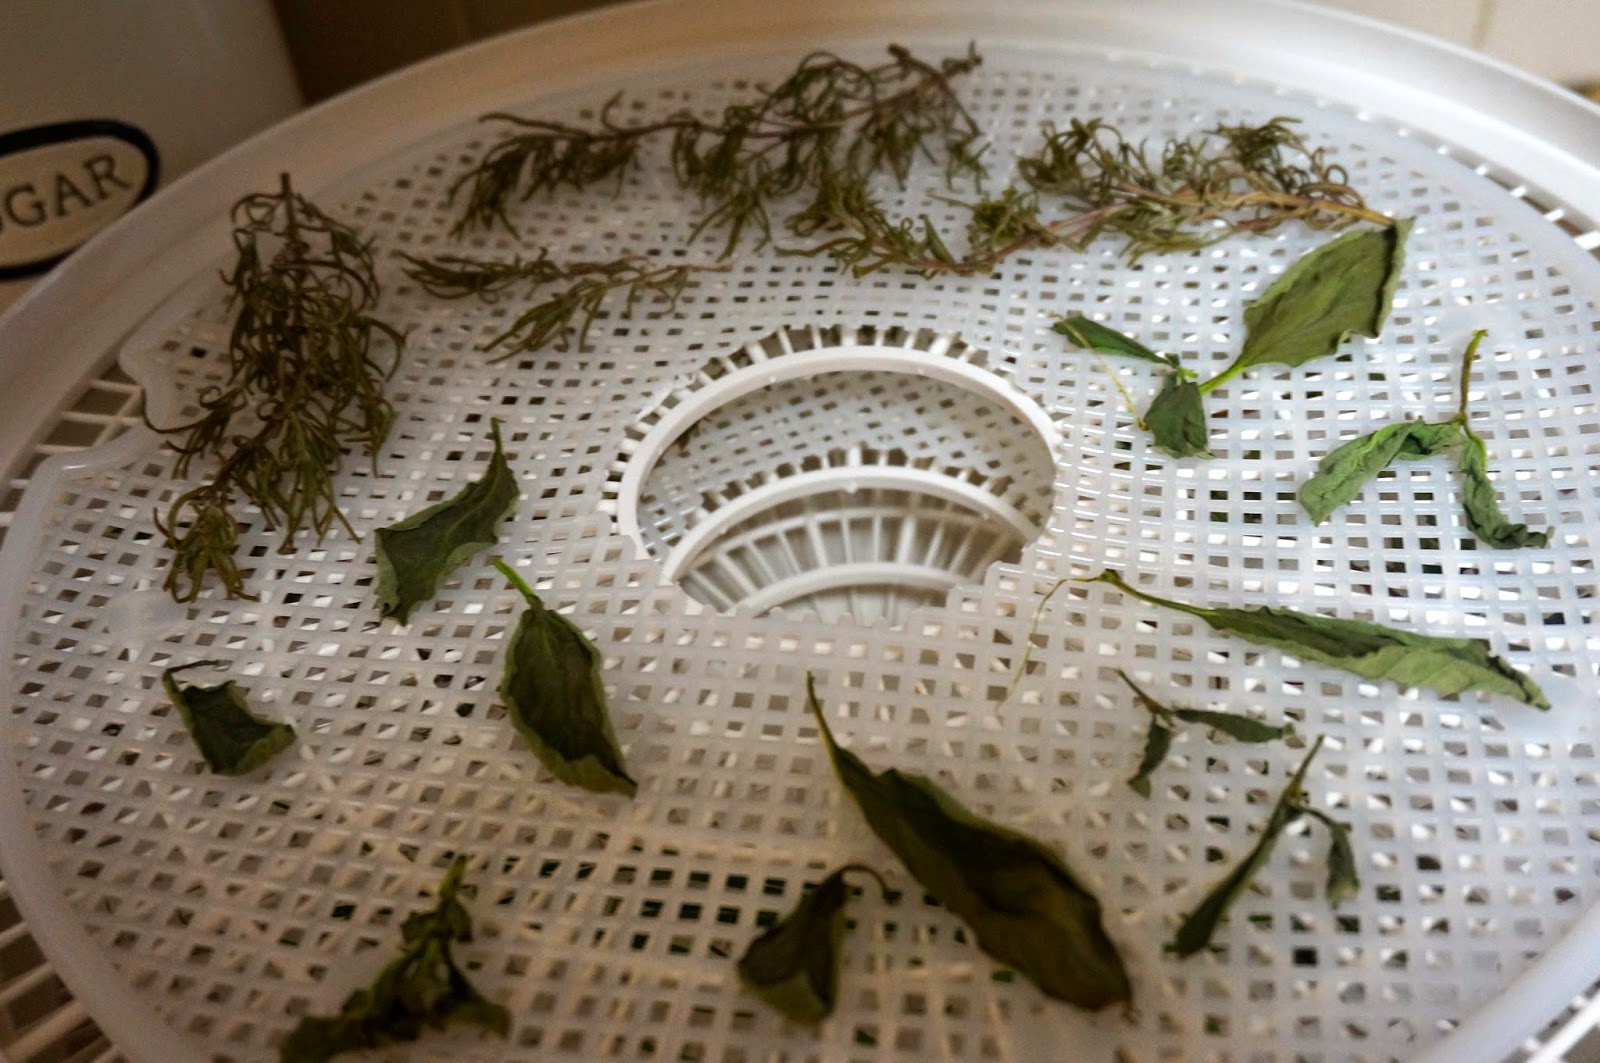
Drying your plants is so easy to do! You can always hang dry your cuttings, but I am impatient, so I use a dehydrator. You can get mesh trays to keep the tiny little leaves from falling through the cracks (they'll shrink as they dry).

Just cut your herbs and wash thoroughly. I usually lay mine out to air dry just for about 20 minutes after washing to let excess water drip off.

Thyme, chives, basil, rosemary, and mint. Fresh from the garden.

My dehydrator is an old Nesco. It's a hand-me-down from my mom. The brand is still around, but I think they're a little snazzier now.
 Trim the stems or any unusable parts of your cuttings. Arrange leaves in a single layer on your trays.


Because my appliance is older, it only has one heat setting. Newer models have varying temperatures available. You may have to play around with your particular settings based on the humidity in your home. It generally takes at least a few hours for everything to dry thoroughly. You want to ensure that everything is dried completely. If moisture is left in the leaves, they could mold after you store them.

This is how they looked after a few hours. Not quite done yet.
I have Tupperware spice containers that worked perfectly for storing my newly dried spices.  I used my label maker so I'd know what was in each container. 


How easy is that? Now you've got spices for a whole lot less, and you can preserve your fresh herbs in case you can't use them all right away!

Note: I've been told that keeping the leaves in their full form until use will guarantee the best flavor. I don't know if this is true or not, but I tend to follow this rule. I just crumble the leaves when I get ready to use them in my cooking.

Hello! Five Minute DIY

I have been MIA forever! It's not like I haven't been doing things. I have. I've documented said things with photographs (that I'll post soon). But to get back in the swing of things, here's a fast project I did tonight.

Coldwater Creek is going out of business, so I picked up a super cute black maxi dress on the cheap the other day. However, I'm super short, and it was super long. I cut off several inches to hem it tonight, and made a quick infinity scarf out of the leftovers. I just used my serger along the seams. I used white thread. I wish I could say I did it because of the contrast, but I really just didn't want to rethread my machine. It did turn out cute, especially for a 5 minute DIY.


Sunday, May 12, 2013

Mother's Day Movies


Happy Mother's Day, all! In the spirit of the holiday, I thought I'd just share a list of some of my favorite mom-centric movies. Some of these aren't solely about the mother, but all have awesome mom figures. What is your favorite movie about Mom?

  • Baby Mama
  • Stepmom
  • Where the Heart Is
  • Little Women
  • Raising Helen
  • Because I Said So
  • Parent Trap (the original, not the Lindsay Lohan version)
  • The Sound of Music
  • Anne of Green Gables (I know Marilla isn't her mom, but still...)
I know I'm missing a bunch but this is what I have for now. In the meantime, I hope everyone has a fabulous Mother's Day!

Friday, May 10, 2013

Vacation Momentos

So you go on that awesome vacation where you pick up t-shirts, take tons of pictures, or maybe bring home a bottle of wine. But, it's hard to put all of that stuff on display (especially if you already drank the wine). Try this instead:

Keep a little bit of currency when you return home from traveling abroad. Frame it. Voila! Souvenir!


I picked up these currency frames a while back at Michaels. They were on clearance for less than $4 each. They came with photo corners and I just stuck some tape runner on the backs of them and on the backs of the coins.


Relax...I know that's a hundred in the bottom frame, but everything in that frame is really less than $2 USD. I'm not crazy, ya know?

Monday, February 18, 2013

Valentine's Day Cresents

Hey all!

The hubs and I actually celebrated Valentine's Day by going out for a wonderful lunch on Friday, because an overcrowded restaurant or movie theater is not my idea of a good date. But even though we weren't celebrating, I did attempt some heart-shaped crescent rolls for dinner on V-Day. Unfortunately, they were more heart shaped before they were baked, but it was worth a shot.

I just unrolled the crescent rolls, and sprinkled with a little garlic salt and "pizza" mix shredded cheese, then rolled over the long corners of the triangle to create the heart. I baked according to the package instructions.


Even though these didn't turn out quite how I planned, I totally love experimenting with crescent roll recipes, don't you? In hindsight, I probably should have just used a heart shaped cookie cutter or something. Check out my cute little muffin pan calzones that I posted a while back, or browse Pinterest for infinite ideas! I keep these little bad boys in the fridge at all times.

Monday, February 11, 2013

Stairway Family Gallery

Oh. My. Blog. I feel like I haven't been here in FOREVER. But at last, after about 6 months of working long hours and a driving a long commute, I am now working part time as a college instructor, so obviously I can get back to important things. Like Lemon projects and blogging about them.

I've been itching for a family picture gallery in the staircase for sometime now. I chose all my own pics (no professionals) so I could easily edit and order what I wanted. I ordered all of my prints from Shutterfly (which I love) and had them delivered. I chose black and white or sepia prints. I showcased family pictures we've done in years past, right alongside vacation shots. I even threw in a few candids for good measure.

Being the frugal crafter/decorator that I am, I scored my frames from a retail store that was getting new displays. They had used these frames in the past and were getting rid of them. I saw my opportunity and seized it. I just had to remove the silhouette pictures in them, and clean them up a bit. Moral of the story: if you see a store with displays you like, ask the manager if they ever change them, and to let you know when they do so you can purchase (usually for pennies on the dollar) or take them instead of them getting thrown out.


All of the frames were either black or silver, and quite large (8"x10" or bigger), so I used a few smaller frames I already had to add to the collection. If you don't have the option for cheapo frames like I did, consider thrift or garage sale shopping for frames you like, then spray painting them all one color or color story (i.e. white, blue, teal, and tan for a beach theme, etc).

After my prints arrived, I took stock of what sizes I had, and the sizes of frames I had, then made a trip to Hobby Lobby for some pre-cut mats in black and white. If the pre-cut mat colors and sizes work for you, this is definitely the most cost-effective way to go. The Lobby of the Hobbies carries them starting at $1.99. Now, I did have square frames and square prints, but I got those cut in simple white mats for only $6 each.


After framing was complete, I set out to create my layout and get them up on the wall. I found lots of inspiration on Pinterest, natch. Be inspired here, here (cute ideas for more than just stairways), and here. You can also get very descriptive tips here. Pinterest and I have already done the dirty work for you. You're welcome.

So here's my stairway (excuse my spackle patches and monkey hooks from previous hanging attempts - those are getting painted later this week):

from the landing

from the top
Pretty much all the DIY sites or pins show making a template, putting it on your wall, then putting in your nails, blah blah blah. I'm more adventurous (or stupid) than that. I planned out my layout in the middle of my game room floor, taking pictures of each layout as I went so I could compare.


I then figured, based on the width of my frames and the spacing I wanted that I'd be centering each column of frames over every other stair. I picked the height (47") I wanted for the bottom frame in the left column and ran with it for the rest. Between frames vertically, I went about 3-4".


I hung all the bottom pictures, getting my spacing right, and then went up from there. Since I wanted each column centered, I used my level to align the monkey hooks (in my humble opinion, by far the easiest hanging tool) so the pictures would automatically hang correctly.


Note, my last two columns start at the same height because they are based off of the landing of the stairway.

And voila, my finished product for less than $50, frames, mats, and prints included! Not bad for my first foray back into the project world.


More lemons coming your way soon.

Thursday, April 19, 2012

Perfect Pot Roast


I created this recipe several years ago mostly by trial and error, just adding things as I went.  It is so easy - lots of ingredients, but you basically just throw everything in a dish, bake and serve.  

Here is what you will need:
1 beef chuck roast (at least 2 lbs.)
1 package of baby carrots (16 oz.)
1/3 cup chopped white onion
1 bag small red potatoes (size C works well - 2 lb. bag)
3 cloves garlic, chopped
1/2 t rosemary
1/2 t oregano
1/2 t Italian seasoning
1/2 t onion powder
1/2 t garlic salt
2 dashes Tony Chachere's seasoning
1 t freshly ground pepper
1/2 t - 1 t freshly ground sea salt
1 T extra virgin olive oil
1 cup water
1 cup red wine (any variety, except dessert wine)

Preheat oven to 350.  Place thawed roast in the center of a 13x5 glass baking dish.  Surround with carrots, potatoes, and onion.  Rub one clove of chopped garlic on roast, and mix the rest of the garlic in with carrots and potatoes.  Drizzle olive oil on carrots and potatoes.  Sprinkle dry ingredients over beef, carrots and potatoes.  Pour water in at the corners (about 1/4 cup water in each corner).  Drizzle about 2/3 cup of red wine over the roast, and the rest over the carrots and potatoes.  It should look something like this:


Cover with foil.  Bake approximately 2 hours or until roast is cooked throughout.  At least once during baking, take out of oven, remove foil, and spoon juices over entire dish to keep moist.

I served with freshly made rosemary batter bread (a recipe I have altered from a Betty Crocker one).  I will post the recipe for the bread later.